
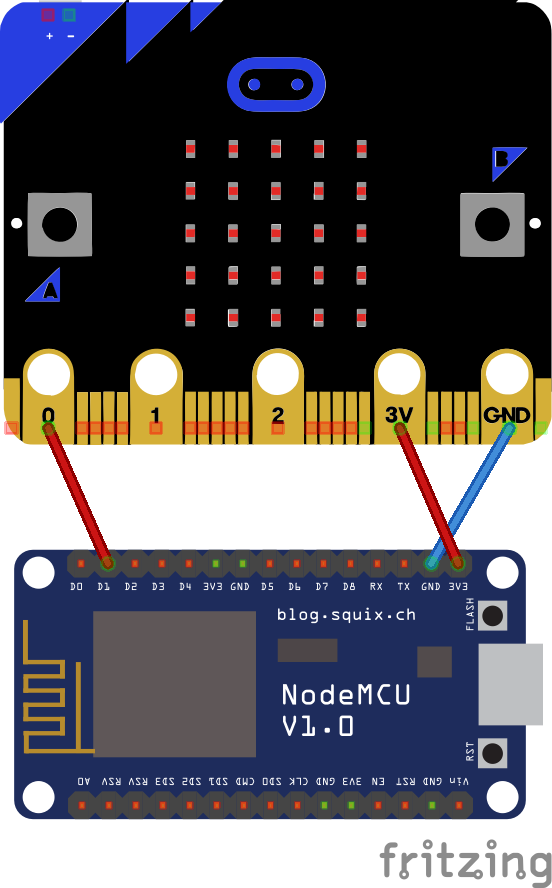
micro:bit -> esp8266 – Simplified Wiring
Arduino Cloud IoT
- Cloud IoT – Create Account & Login
- Download “Agent” – supports Cloud->USB Flash
Thing
- Add New IoT Thing
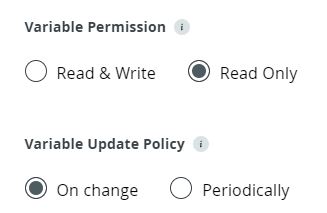
Under Setup: - Add Variable –
- SMM Zone Alert – Boolean (Read Only)
- Hawker Stall # – Integer Number (Read & Write)
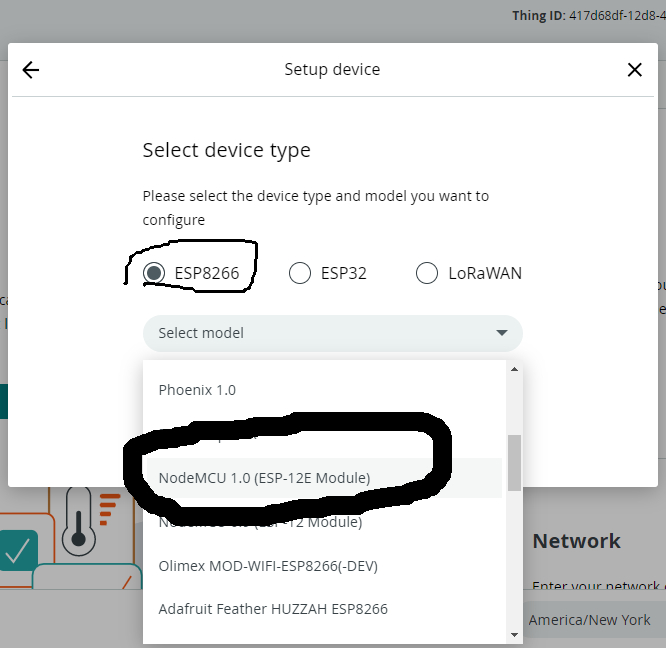
Under Select Device:
- Setup New Device
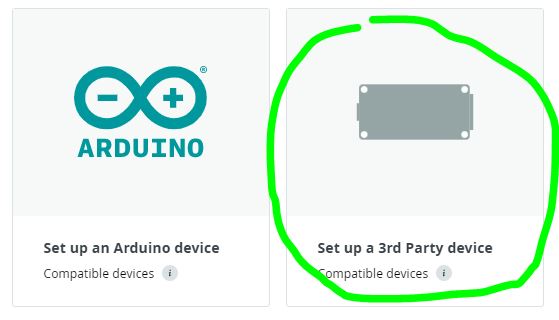
- Select the correct board:
- Name your Device
- Copy the Secret Key / download the PDF (you will need it in Network setting)
Under Network:
- Configure with your Hotspot SSID/Password that your device will use to connect to the internet from any location.
- For Secret Key – use the one from Device setup above
Under Sketch:
- For simple Boolean example like SMM Zone Alert, add the following under setup() & loop():
void setup() {

  pinMode(D1, INPUT);
...
...
...
void loop() {
ArduinoCloud.update();
varname = digitalRead(D1); // read the pin state on D1
// D1 is connected to micro:bit
}- Verify & Flash the code – make sure your board is connected
(NOTE: THIS TAKES A LONG TIME)
Dashboard
- Navigate to “Dashboards”
- Build New Dashboard
- Add widget – for SMM Alert, you can use a Status widget, or LED, etc
- Link the Thing Variable you’d like to track
- Change any settings
- Save
- Test! (should be able to see widget states change with the micro:bit changes to its output pin – can use button A/B to write different states to the pin – 0 in the above example)