Low Cost Underwater Robot

This design is based loosely on the SeaPerch, but modified to use cheaper parts. My objective is to bring the cost low enough that every kid can build one and bring it home.

The parts list is constantly changing as I find better ways of doing things, but in the current iteration, these are what I used…

  • Motors (these are tricky to get right, and I’ve written more about it below)
  • Motor Drivers (H-bridge)
    • 5A 3V – 14V: These are cheap, and 5A is adequate for a fairly high power motor.
  • Propellers
    • 28mm and 42mm: The 385 motor I have works better with the larger propeller, but other motors work better with the smaller one. You’ll need to experiment to determine which is best. If in doubt, the smaller propeller is generally the safer choice (…less likely to overload the motor).
  • Shafts
    • The propeller can be mounted directly on the motor, but adding a shaft can improve water flow and performance. Not essential.
  • Shaft couplings
    • Only needed if a shaft is used. Get a 2.3mm to 2mm coupling (2.3mm for motor side, and 2mm for shaft side).
  • Motor casing (3D printed)
    • OnShape model. The model is parametric, so you can easily set it to fit any motor and PVC pipe size.
    • Alternatively, you can use a film canister, but it may be harder to mount these on the PVC pipes.
  • Wax. I’m melting down tea lights for this, but any wax should do fine.
  • Electrical / Insulating tape. Nothing special. Any type will do.
  • PVC pipes and fittings. I’m using 18mm PVC pipes, but any type will do.
  • Cables. I’m using ethernet cables for these. The unit price is low if you buy an entire reel (…typically 1000ft).
  • Battery + Battery Holder
    • 18650 Battery with 2 or 3 slots holder. The motors can be rather weak with just 2 x 18650. It’ll be necessary to ballast the robot carefully or it won’t be able to submerge. Performance is much better with 3 x 18650, but be careful of the current draw as the wires on these battery holders are rather thin and will burn out if the motors are heavily loaded.
    • Alternatively, use a 3S battery pack like this. These are typically used for RC toys and can supply much more current. You’ll need a suitable connector to wire this.
  • Joystick module
  • Mini-breadboards
  • Microcontroller (ESP32)
    • I typically get the model described as “CH340C TYPE-C”
  • Potentiometer with knob
  • Dupont jumper wires
    • You’ll need some M-F and some M-M
  • Controller
    • I laser cut them from 3mm plywood, but you can also cut a rectangular board by hand or use any rigid board for support.

Motors

The SeaPerch uses the Jameco 232022 motor. It works well, but current draw can be a little high and the shipping to Singapore is rather expensive. Probably a good option if you want more certainty and power.

I’ve gotten good results from a motor purchased off Aliexpress described as a “385 Motor”. Lower power, but the lower current draw makes it easier to power and drive. Less than half the price of the Jameco, but like most stuff off Aliexpress, there are little specifications provided and no guarantee that all “385 motors” performs the same.

Code

I program the micro-controller with IoTy. You will need to flash the IoTy firmware on to the ESP32 using this page first.

You can find some slides on how to use IoTy here (under “Electronics with IoTy”).

The code I use for the underwater robot is here. Depending on your choice of pins, you may need to modify the code a little.

Instructions

Pending…

Potential Improvements

Semi-Wireless

The battery, ESP32, and motor drivers can be placed in a waterproof box and allowed to float above the robot. The joystick and potentiometer can be connected to a second ESP32, which transmit commands to the first ESP32 via the ESP-NOW protocol.

With such a design, the robot can travel further and use a shorter cable. The added cost of a second ESP32 and a waterproof box is marginal, and the code change is minimal.

Underwater Camera

While I have successfully waterproofed and used a low cost USB camera module (<$5), the waterproofing process appears difficult for students to follow and the failure rate is very high. Need to explore other low cost waterproofing methods.

4 Schools, 13 Trophies, 5 Leagues Clinched – RoboCup SG Open 2023

This past weekend at RoboCup 2023, our Singapore students really impressed us with their perseverance and effort. We coached CCAs at Cedar Secondary, Pei Hwa Secondary, ZhengHua Primary and Clementi Town Primary schools. Roughly 100 students – about a fifth of the competition total!

Out of Six leagues they competed in, our students took home First Place trophies in all but one. In two categories, our schools won all the trophies…

Rescue Line Entry, U12 – Gold & Silver

OnStage U19, Gold & Silver

CoSpace Rescue, U12 – Gold & Bronze

CoSpace Rescue FS, U12 – Gold, Silver & Bronze

CoSpace Rescue, U19 – Bronze (& 4th place)

CoSpace Rescue FS, U19 – Gold, Silver & Bronze

We salute their work and commitment, and their sportsmanship.

We like supporting RoboCup as it feels the least commercialized of all the competitions in Singapore, with little to no reliance on any particular vendor or hardware, a licensed but free software created in partnership by Singapore Polytechnic.

A big thank you to Dr. Changjiu Zhou for supporting RoboCup in Singapore, Asia Pacific and globally for all these years!

SuperPowered – FLL Missions Demonstrated on GearsBot

First of all, crazy how long since we last put anything up here.

I guess we’ve been busy!

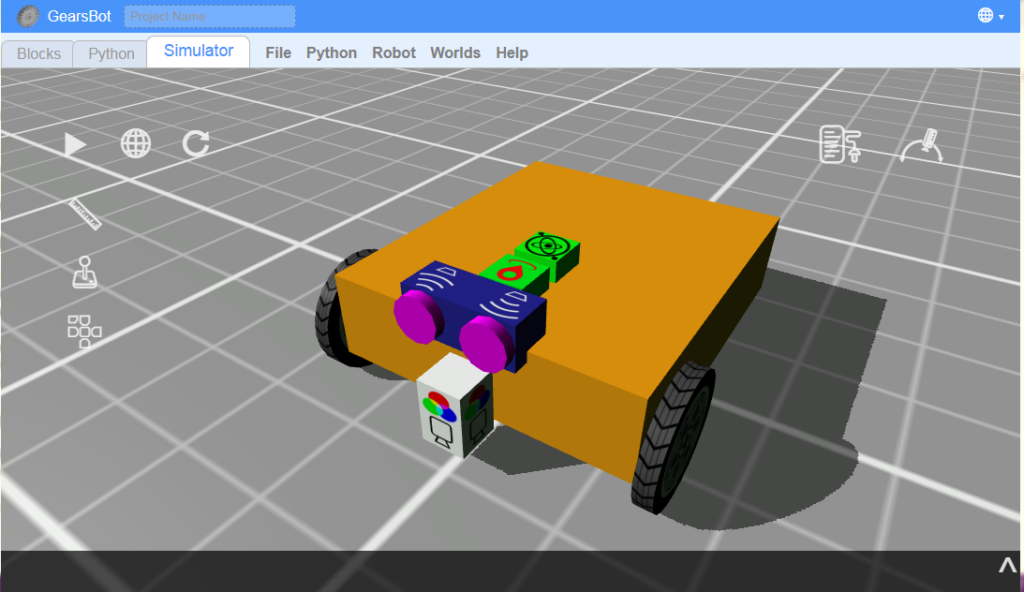
If you haven’t seen it yet, please take a look at the GearsBot platform that Cort has created in the past couple of years.

It’s been a labor of love – an completely open-source and free top-of-the-line realistic, robotics simulator. It has block-based programming, Python, and is compatible with EV3 APIs, so can be used in conjunction with LEGO robotics education. It had helped us, and countless others like us, keep going during the pandemic video-conferencing days and the ensuing transformation in online education.

As of late, Cort has been doing is utmost to keep the Missions category of the simulator up to date with the latest competition models.

For this year’s FIRST LEGO League (FLL), Cort has created an early tutorial video for most of the missions that helps participants visualize the mission models before they can get their hands on it. Subscribe to our channel and be the first to see what comes next:

If you are teaching a beginners robotics course you can start things off with our basic GearsBot curriculum and challenges.

We’ll try to post more about our exciting new educational tools and adventures.

Lego EV3 Ball Launcher

When I added the paintball launcher to GEARS (https://gears.aposteriori.com.sg), I wanted it to…

  • Have controllable launch power
  • Works with a single motor
  • Be plausible to implement with Lego parts

I eventually decided on a control scheme where the motor is turned in reverse to pull back the “spring”, and turned forward (…by any amount) to trigger the launch. Launch power is controlled by the amount of pull back; the more you pull back, the greater the eventual launch velocity.

This control scheme addresses the first and second requirements, but is it plausible to implement it with real Lego parts? I’m pretty sure I cannot match the size and performance of the simulated paintball launcher, but I wanted to make sure that it’s possible to build a device that can at least achieve the same functionality.

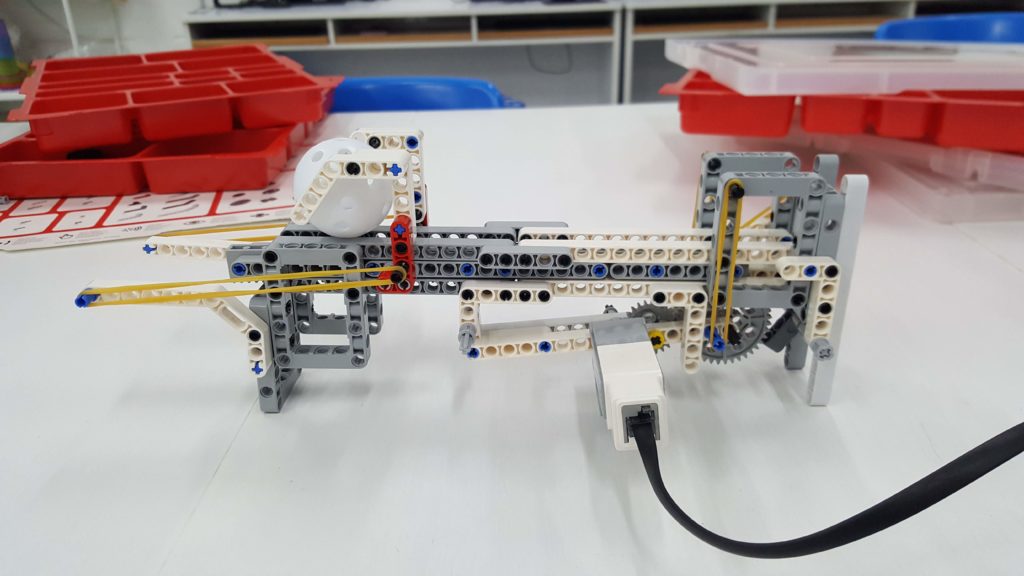
I built this ball launcher as a proof-of-concept. It uses a single medium motor to both pull the rack back and trigger the launch, in the same manner as the simulated paintball launcher in GEARS. The key to the way it works lies in the…

  • Pivoted pinion gears
  • Ratchet mechanism

Pivoted Pinion Gears

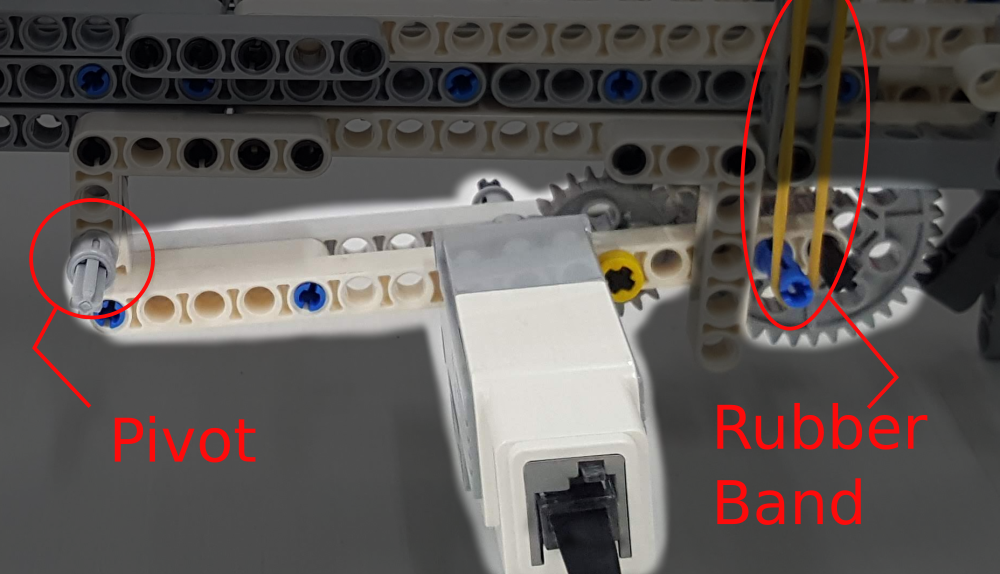
A couple of rubber bands pull this upwards to mesh with the rack, but with sufficient force, it can be pushed down to release the rack and allow it to shoot forward.

Pivoted Pinion Gears

Ratchet Mechanism

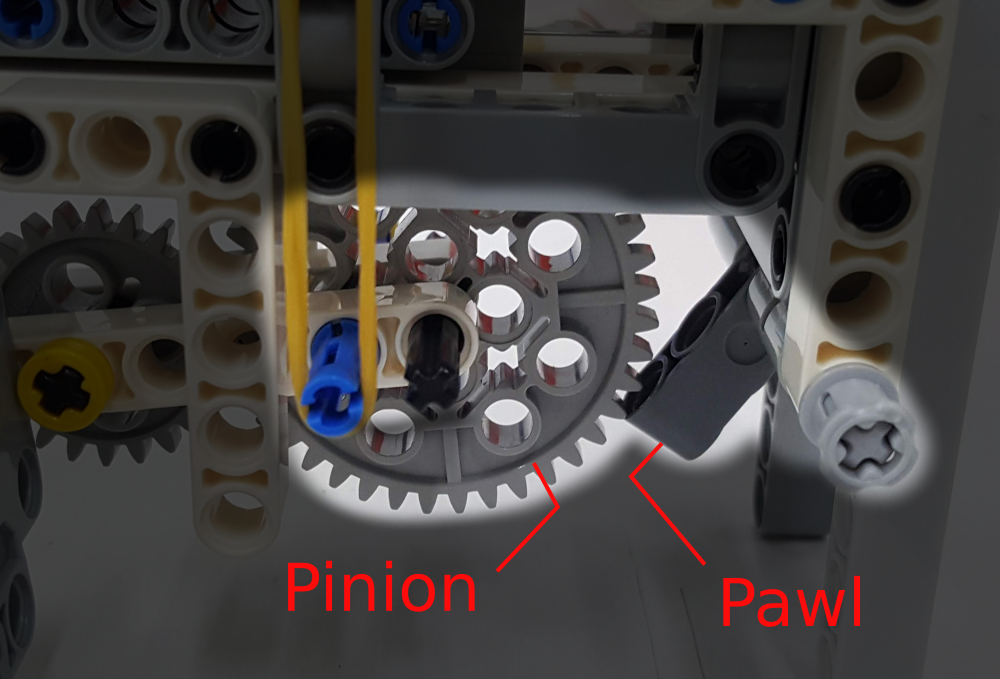
The ratchet mechanism allows the pinion to turn freely clockwise (…when pulling back the rack), but when the pinion attempts to turn counter-clockwise (…forward direction), the pawl will engage, causing the pinion to push itself downwards instead. This disengages the pinion from the rack, allowing it to shoot forward and launch the ball.

Ratchet Mechanism

Results

As expected, the launcher’s performance is underwhelming; the ball can’t travel more than a few centimeters before hitting the ground. But as a proof-of-concept, it demonstrates that the control mechanism used in the simulator is viable in real life.

To improve performance, we can increase the number of rubber bands. Increasing the length of the rack to allow the rubber bands to be stretched more could help, but that may also worsen performance by increasing the amount of dead weight that needs to be accelerated forward. If the velocity is increased, it may also be a good idea to add some kind of damper at the front to prevent damages to the plastic parts.

If you managed to build a better launcher with the same control scheme, send me a video and I’ll link to it here.

All-In On VEXcode VR (for now…)

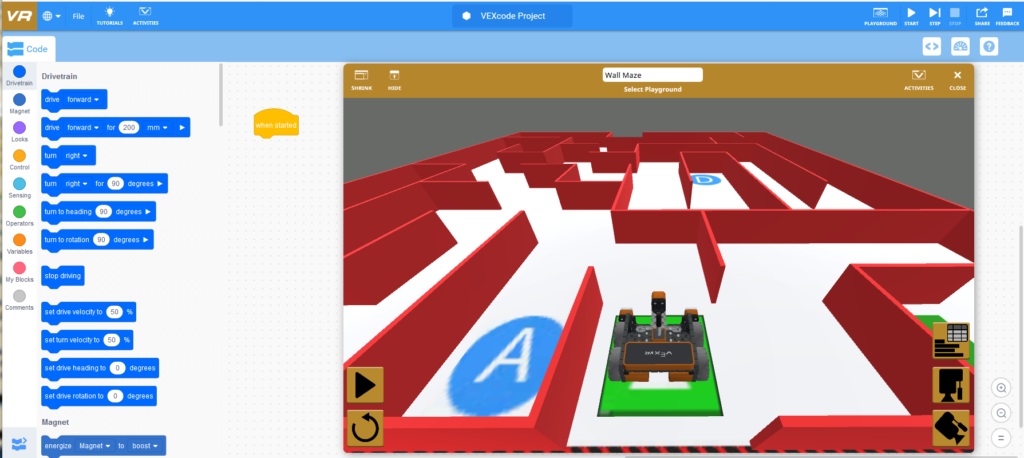
As we were looking around for best practice solutions to continue teaching Robotics in the virtual classroom, VEX announced its release of VEXcode VR. Besides being made free for public and educational use, the VEXcode VR platform was designed an equalizer, so that no matter what device you had access to, you could participate in online STEM learning.

This platform just ticked the box for all of the requirements that were suddenly coming fast and furious from schools, who wanted to resume enrichment programs through virtual classrooms:

  • Robotics Simulation
  • Block Programming + Python API
  • Simulated Sensors & Actuators
  • Algorithmic Challenges – not just hard-coding paths
  • Fun to play with!
  • Soft Hardware Requirements – Can be used on iPads or other Tablets
  • Enough depth for 1-2 months of lessons (wishful thinking)

There’s an Art Canvas for Turtle programming, a Maze for path creation and algorithmic way-finding, a Castle for a bumper/crasher game, an electromagnet-based game challenge for collecting game elements on the field. Grids that can be used to teach some abstract math concepts, like 2D coordinate systems. It’s quite robust, too!

Is it a perfect platform? No.

Some glaring issues:

  • No way to simulate line-following, one of the main use-cases of Robotics competitions in primary and secondary school level events.
  • No way for two robots to interact on a single game field concurrently
  • No way to design robots
  • No moving actuator (only an electromagnet)
  • A too-perfect simulation, physics engine-wise
  • Limited scope with no obvious pipeline of expansion

Still, we want to thank VEX and Innovation First for their generous and timely release.
If nothing else, it has piqued our interest again in creating our own Robotics Simulation toolkit (TBC).

Applied Learning Program – Online

So far 2020 has been a long parade of kicks in the butt! But, A Posteriori has always possessed a great sense of humor, and while we take the utmost precautions dealing with the COVID-19 pandemic, and strictly adhere to health regulations, we have also tried to keep up with programs and offerings for our students.

In April, we moved online to conduct part of our Applied Learning Program (ALP) in Electronics, Programming, Design Thinking on the theme of Active Living. We managed to get the students to take physical kits home, and setup virtual classrooms of Discord mainly. Discord, which is free, has a natural “room” or “team” setup, so we could work with multiple design groups separately and almost concurrently – similar to walking around the classroom from desk to desk. Except it wasn’t, and only a half or so of the secondary school students managed to participate actively for the online duration of the program.

I learned to respond to the name Cher.

Some of the results were really great:

Dance Dance Revolution console for disabled people – large 4-button distributed keyboard that can be used by any combination of whole or damaged limbs. The project used Makey Makey to receive game control input, and an Arduino with PulseSensor to monitor heart-rate.

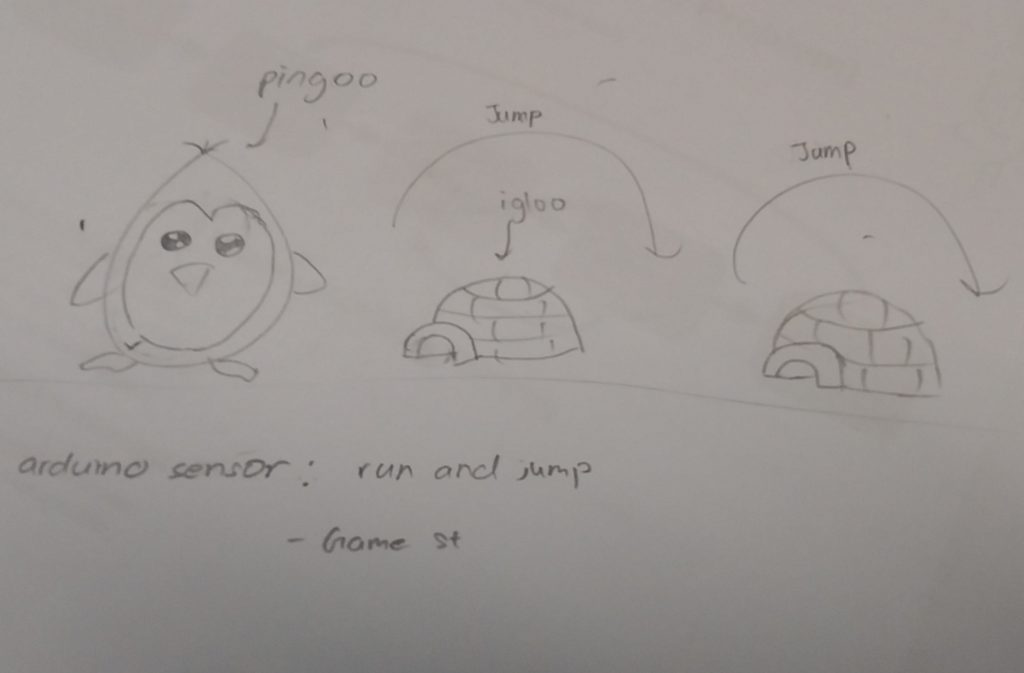
Several jumping, push-up, or hand exercise virtual games with playful characters responding in real-time. Mostly utilizing ultrasonic and PIR sensors.

Game Design Sample

A Cyclotron using simple IR reflective sensor with Arduino.

Several lock boxes – for your smartphone – that unlock after some heartrate has been achieved for a specified duration.

We really had fun supporting this cohort of Sec-2 students.

BTW – not this one:
“cher” as in short for teacher:

Water Rockets with micro:bit

We didn’t plan on running any holiday programmes in March this year, but a group of parents requested for it, so we came up with the idea of combining water rockets with micro:bits. The micro:bit is used to measure flight acceleration, and can also be used to measure flight time.

In the morning, the kids learned about how rockets work and tested different stabilizing fins designs. Then after lunch, they constructed their rocket, programmed the micro:bits, and drop-tested it before the actual launch. We didn’t have time during this one-day programme for everyone to construct their own launcher, so we used one that we’ve built the day before.

Solar Eclipse 2019

On 26 Dec 2019, Singapore experienced an annular eclipse. As a service to the community, we ran a free programme open to the public. Had a good turnout with about a dozen kids, and a surprising number of adults from the nearby businesses joined in as well.

We started with the science behind solar eclipses (slides are here if you want to use it for your own eclipse activities)…

Everyone built their own pinhole viewers…

…but the one I prepared was a little bigger than the rest…

…bigger viewers produces a larger image

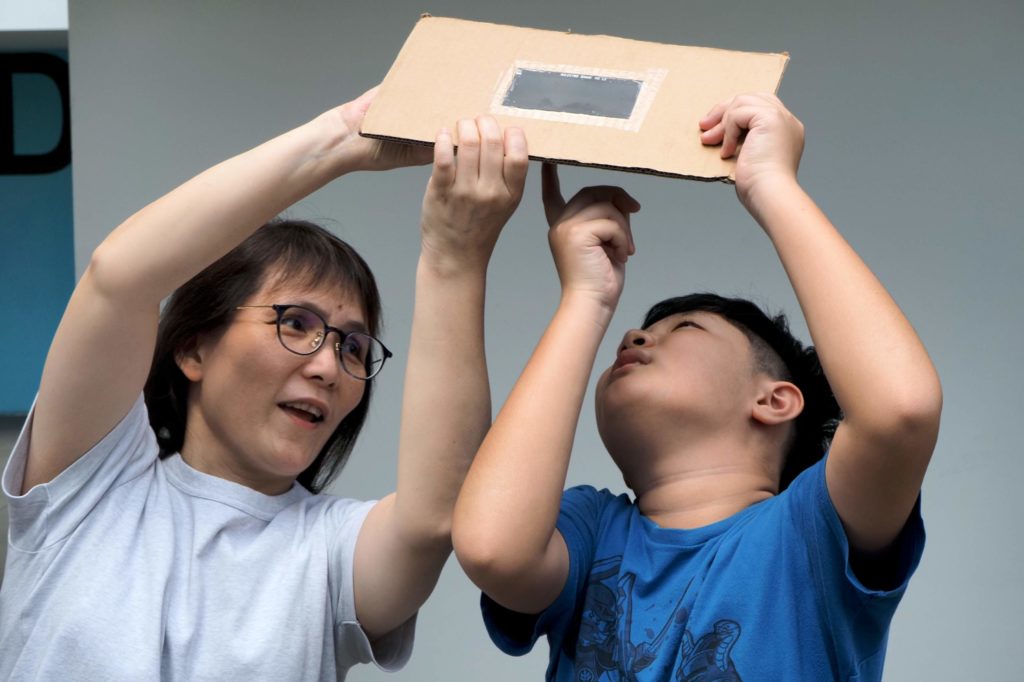
We mounted a few Shade 12 welding glasses to cardboard frames for direct viewing…

As well as some lenses and mirrors for projection onto a wall…

…a big hit for photo taking

A micro:bit was used to track and generate a live plot of the light level as the eclipse progresses. Didn’t take any photos of the micro:bit setup, but we wrapped it with some packing foam to diffuse and attenuate the light.

Light level reached a minimum at around 1330H, before rising again. The frequent short and steep dips are due to cloud cover.

Looking forward to the next one in 2063!

Marine Expedition (Nov 2019)

This is our second run of the Marine Expedition programme. This time, the kids’ creation includes…

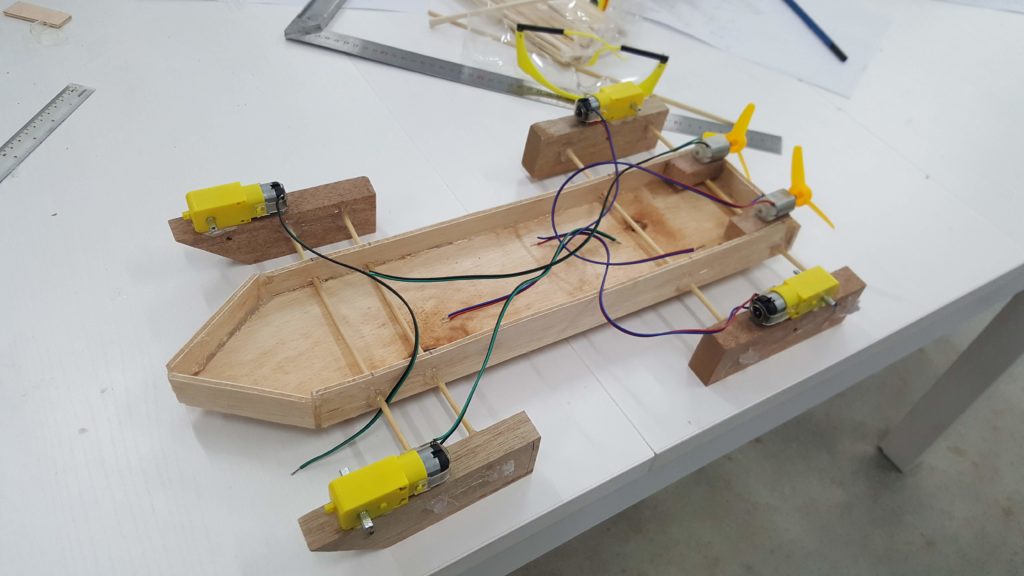
Pentamaran with 2 fans and 4 paddles

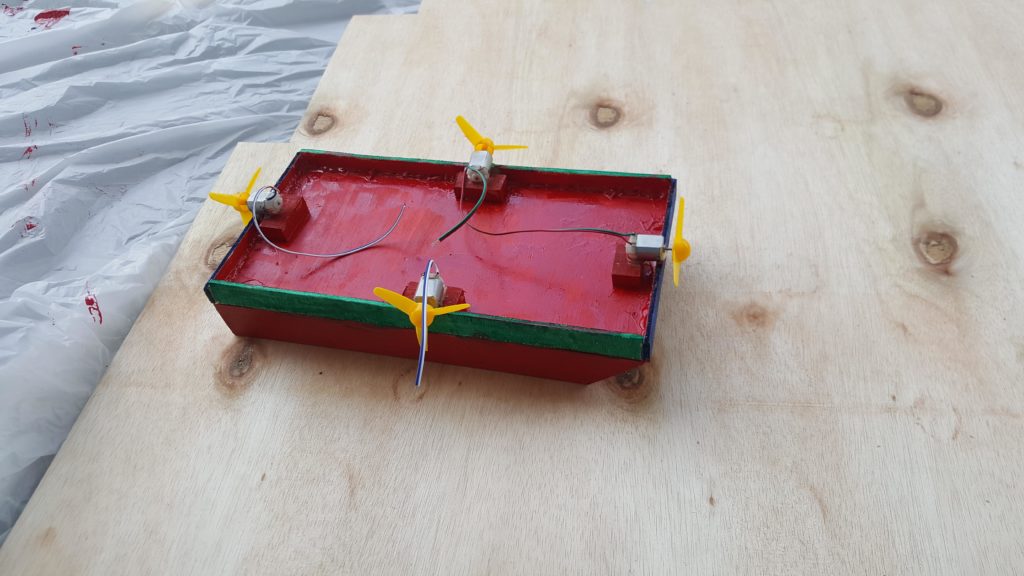
All directional fan boat with a catamaran base

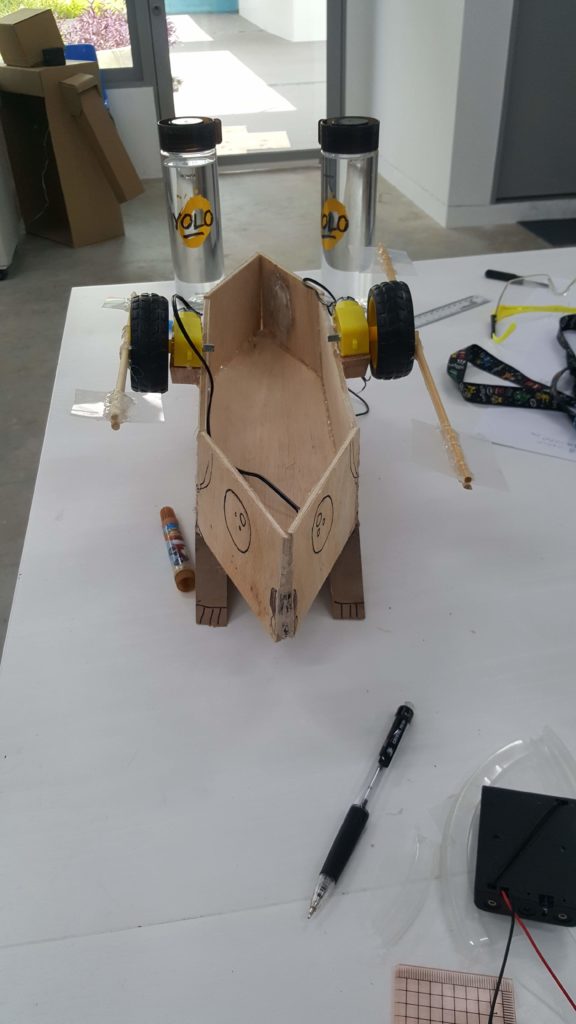
Doggy paddle boat (…with two hidden waterjets)