
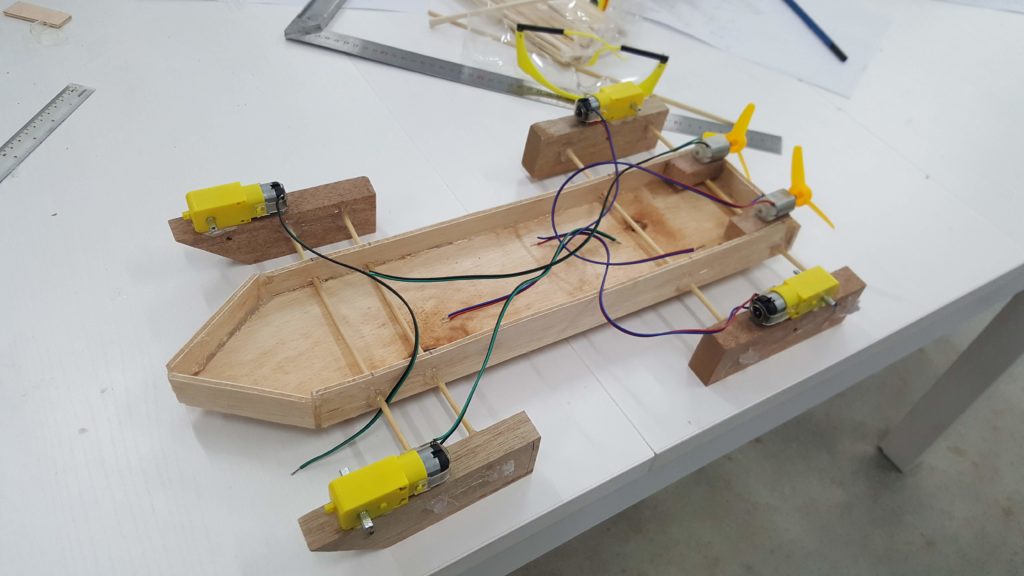
This design is based loosely on the SeaPerch, but modified to use cheaper parts. My objective is to bring the cost low enough that every kid can build one and bring it home.
The parts list is constantly changing as I find better ways of doing things, but in the current iteration, these are what I used…
- Motors (these are tricky to get right, and I’ve written more about it below)
- Motor Drivers (H-bridge)
- 5A 3V – 14V: These are cheap, and 5A is adequate for a fairly high power motor.
- Propellers
- 28mm and 42mm: The 385 motor I have works better with the larger propeller, but other motors work better with the smaller one. You’ll need to experiment to determine which is best. If in doubt, the smaller propeller is generally the safer choice (…less likely to overload the motor).
- Shafts
- The propeller can be mounted directly on the motor, but adding a shaft can improve water flow and performance. Not essential.
- Shaft couplings
- Only needed if a shaft is used. Get a 2.3mm to 2mm coupling (2.3mm for motor side, and 2mm for shaft side).
- Motor casing (3D printed)
- OnShape model. The model is parametric, so you can easily set it to fit any motor and PVC pipe size.
- Alternatively, you can use a film canister, but it may be harder to mount these on the PVC pipes.
- Wax. I’m melting down tea lights for this, but any wax should do fine.
- Electrical / Insulating tape. Nothing special. Any type will do.
- PVC pipes and fittings. I’m using 18mm PVC pipes, but any type will do.
- Cables. I’m using ethernet cables for these. The unit price is low if you buy an entire reel (…typically 1000ft).
- Battery + Battery Holder
- 18650 Battery with 2 or 3 slots holder. The motors can be rather weak with just 2 x 18650. It’ll be necessary to ballast the robot carefully or it won’t be able to submerge. Performance is much better with 3 x 18650, but be careful of the current draw as the wires on these battery holders are rather thin and will burn out if the motors are heavily loaded.
- Alternatively, use a 3S battery pack like this. These are typically used for RC toys and can supply much more current. You’ll need a suitable connector to wire this.
- Joystick module
- Mini-breadboards
- Microcontroller (ESP32)
- I typically get the model described as “CH340C TYPE-C”
- Potentiometer with knob
- Dupont jumper wires
- You’ll need some M-F and some M-M
- Controller
- I laser cut them from 3mm plywood, but you can also cut a rectangular board by hand or use any rigid board for support.
Motors
The SeaPerch uses the Jameco 232022 motor. It works well, but current draw can be a little high and the shipping to Singapore is rather expensive. Probably a good option if you want more certainty and power.
I’ve gotten good results from a motor purchased off Aliexpress described as a “385 Motor”. Lower power, but the lower current draw makes it easier to power and drive. Less than half the price of the Jameco, but like most stuff off Aliexpress, there are little specifications provided and no guarantee that all “385 motors” performs the same.
Code
I program the micro-controller with IoTy. You will need to flash the IoTy firmware on to the ESP32 using this page first.
You can find some slides on how to use IoTy here (under “Electronics with IoTy”).
The code I use for the underwater robot is here. Depending on your choice of pins, you may need to modify the code a little.
Instructions
Pending…
Potential Improvements
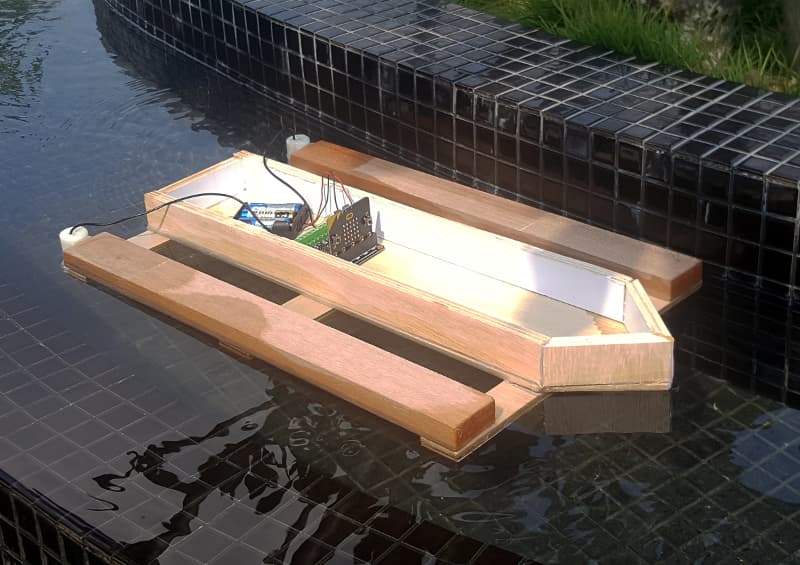
Semi-Wireless
The battery, ESP32, and motor drivers can be placed in a waterproof box and allowed to float above the robot. The joystick and potentiometer can be connected to a second ESP32, which transmit commands to the first ESP32 via the ESP-NOW protocol.
With such a design, the robot can travel further and use a shorter cable. The added cost of a second ESP32 and a waterproof box is marginal, and the code change is minimal.
Underwater Camera
While I have successfully waterproofed and used a low cost USB camera module (<$5), the waterproofing process appears difficult for students to follow and the failure rate is very high. Need to explore other low cost waterproofing methods.

